Happy Easter! to all those that celebrate it, and Happy Spring! to everyone else!
This year I painted my eggs with simple wax patterns before dyeing them. It was a surprisingly easy process, but it’s probably not the best egg dyeing project to do with children, as you’ll be working with hot wax.
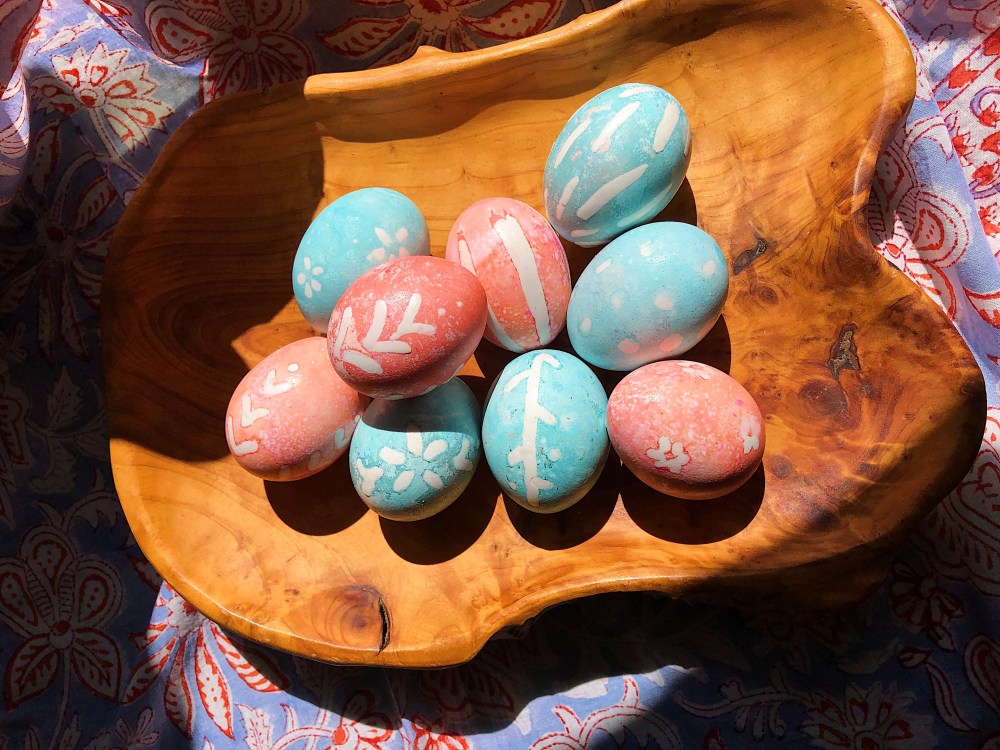
Materials:
- a small Paint Brush (it’s unlikely that you will ever be able to fully remove the wax from it, so keep that in mind when selecting your brush)
- a lite jar Candle or wax diffuser with melted Wax in it.
- a dozen Hardboiled Eggs (white egg will produce brighter colors then brown egg)
- Red and Blue Gel Food Coloring
- 1/2 cup White Vinegar
- ~1 cups Boiling Water
- 2 short Glasses
- 2 Spoons
- have Paper Towels on hand for the rapid clean up of spilled or dribbled dye
Instructions:
- Melt your wax, by either lighting a candle or turning on you wax diffuser.
- Carefully dip your paint brush into the wax, and paint a pattern with the wax upon your egg. The wax will cool quickly and solidify so try to keep you brush submerged in the hot wax as much as possible. Work as quickly as possible, and make sure that the wax on your egg is fully dry before setting the egg back down again.
- Pour 1/4 cup of vinegar into the bottom of each glass.
- Distribute the boiling water evenly among the glasses. You want them filled enough to fully submerge an egg.
- Add in the color.
- Use a spoon to carefully lower the eggs into the dye.
- Lift the eggs from the dye, and allow your eggs to dry.
- Store the eggs in the fridge.
- Use your fingers to gently slide off the remaining wax.


